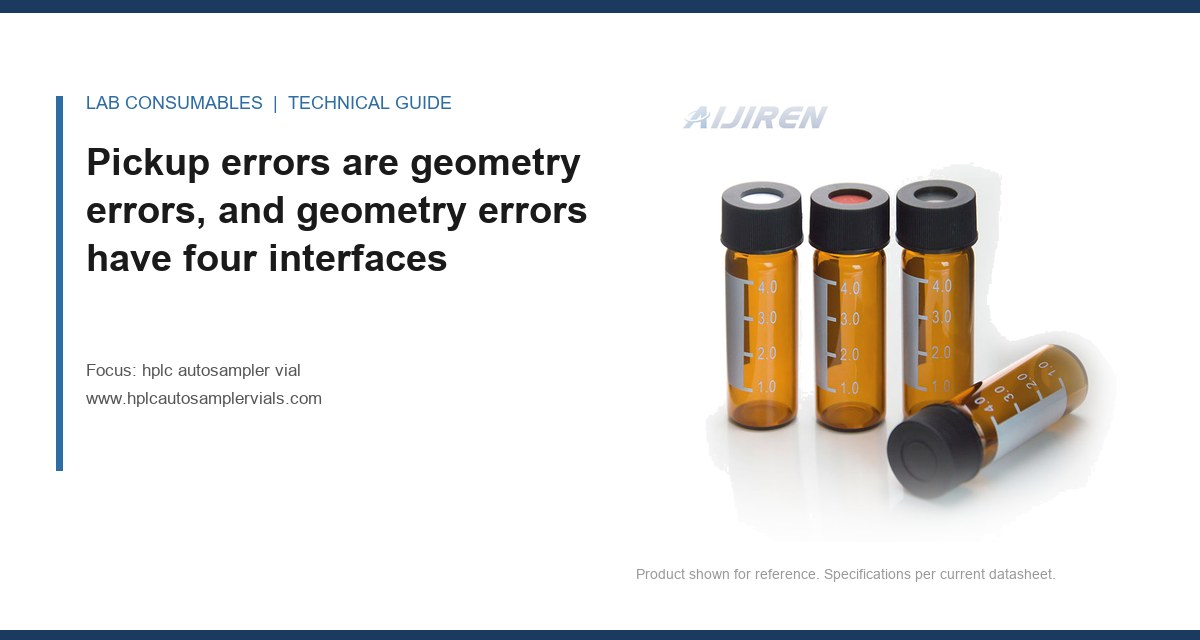
A vial that sits 0.4 mm too high in the tray will pass the teach routine, pass the first three injections, and then throw a “no sample” or “vial not found” error at position 47 of a 96-well run. The needle never touches the septa. The gripper closes on air. The instrument reports a pickup error, and the analyst reaches for a new vial lot when the real fault is the tray height they changed six weeks ago. Autosampler pickup error and misalignment almost never come from the vial being the wrong vial. They come from the geometry between the vial, the cap, the tray, and the gripper, and each of those interfaces has a tolerance you can measure.
I have chased this class of fault on Agilent 1260/1290, Thermo Vanquish and Ultimate 3000, Waters Alliance, and Shimadzu Nexera systems. The error text differs. The physics does not. Below is what actually moves, what the instrument sees when it moves, and the numbers that tell you whether you are looking at a vial problem or a hardware problem.
Every pickup fault resolves to one of four places where the vial meets the instrument:
- Tray or carousel seat: the vertical plane the vial base rests on.
- Gripper or needle carriage: the horizontal position the instrument thinks the vial center is at.
- Cap seating: how far the cap skirt sits down on the neck, which sets the septa height the needle actually meets.
- Vial body: the dimensional stack of base, body, shoulder, and neck that places the septa in space.
If any one of these drifts, the needle or gripper misses. The vial gets blamed because it is the part you can swap in ten seconds. The HPLC autosampler vial is the last place to look, not the first, but it is the part with the tightest published tolerance, so it is also the easiest to clear or convict with a caliper.
Tray height is the first thing to measure, and almost nobody does
On Agilent 1260/1290 autosamplers with the standard 100-vial tray, the gripper has roughly ±0.5 mm of vertical compliance before it fails to grip a 12 x 32 mm vial. That is the whole budget. A tray that sits 0.6 mm high because someone re-seated it without pushing the locating pins home will grip vials at the front of the tray and miss them at the back, because the tray is not perfectly flat.
Measure it with a depth gauge, not by eye. Drop the gauge onto the tray floor at four corners and the center, with no vials loaded. The spread across those five readings should be under 0.2 mm. If it is not, the tray is warped or the seat is not clean. I have seen a single dried drop of mobile phase under a tray corner lift it 0.3 mm, enough to push a rear-row pickup into intermittent failure.
The Thermo Vanquish split-tray design is more forgiving because each tray half locates independently, but the same rule applies. If you can slide a 0.5 mm feeler gauge under the tray edge at any point, the tray is not seated.
Carousel systems have a different failure mode
On Waters Alliance and older Shimadzu carousels, the vial seat is a molded pocket, and the failure is not vertical but rotational. A carousel that has been dropped, or run with a cracked pocket, will tilt a vial by 1 to 2 degrees. A 1.5-degree tilt on a 32 mm vial moves the septa center by about 0.4 mm laterally. That is enough to put the needle off-center on a 6 mm septa and start coring at the edge, which then produces a bent needle and a pickup error on the next vial. If you see a bent needle, check the carousel pocket before you check the vial lot.
The gripper tolerance is tighter than the vial tolerance, and that is the point
Here is the number that matters. A 12 x 32 mm autosampler vial per the GPI 12-32 dimensional standard has a body diameter of 12.00 mm nominal, ±0.20 mm at the widest point. The gripper jaws on most instruments close to a fixed gap and rely on spring compliance to grip a range. Agilent specifies gripper grip on the neck, not the body, for exactly this reason. The neck diameter is held tighter, around 8.2 mm ±0.1 mm on a crimp-neck vial, because that is the surface the gripper and the cap both index to.
So when a gripper fails to pick a vial, the question is which surface it is trying to grab. If it grips the body and the body is at the top of its tolerance (12.20 mm), the jaws may not close far enough to hold. If it grips the neck and the neck is at the bottom of its tolerance, the jaws close but the vial can rotate or tilt during transfer.
| Interface | Nominal | Tolerance | Typical instrument budget |
|---|---|---|---|
| Vial body diameter | 12.00 mm | ±0.20 mm | Gripper jaw gap ~12.5 mm open, spring closed |
| Vial neck diameter (crimp) | 8.20 mm | ±0.10 mm | Neck grip jaws, ~0.3 mm compliance |
| Vial height (base to top of cap) | 32.00 mm | ±0.30 mm | Needle stroke reference, ±0.5 mm |
| Cap skirt depth (crimp) | ~6.5 mm | ±0.15 mm | Septa height set by skirt, not vial |
| Tray seat flatness | 0 mm | 0.20 mm across tray | Gripper vertical compliance ±0.5 mm |
The lesson from that table: the vial body tolerance (0.4 mm total) is wider than the tray flatness budget (0.2 mm), and the gripper has to absorb both. When a gripper starts dropping vials, it is usually because the accumulated stack, vial plus tray plus gripper wear, has crossed the compliance limit. Measure the vial first because it is cheap to measure. If the vial is in spec, the gripper is worn.
Cap seating is where pickup errors and needle damage share a cause
A crimp cap that is not fully seated sits high on the neck by 0.3 to 0.8 mm. The instrument’s needle stroke is referenced to the top of the cap, not the vial base, on most designs. A high cap means the needle thinks it has reached the septa when it has not, so it either short-strokes into the septum at the wrong depth or, on instruments that sense resistance, throws a needle fault before it ever draws sample.
The seating check is a torque and a measurement. For an 11 mm crimp cap on a 12 x 32 mm vial, the crimper should close the cap skirt to a final neck diameter of 11.0 to 11.2 mm measured across the crimp. Below 10.9 mm you have over-crimped, the septa is compressed and the cap may crack the neck. Above 11.3 mm the cap is loose and will lift. Measure ten caps from a new lot with a crimp gauge or a caliper across the skirt. If the spread is more than 0.2 mm, your crimper is out of adjustment or your caps are from a mixed lot.
For screw caps, the number is torque. An 8-425 screw cap on a 12 x 32 mm vial should be tightened to 0.4 to 0.6 N·m. Under 0.3 N·m and the cap backs off during transport, lifting the septa. Over 0.8 N·m and you deform the septa and the neck, both of which move the septa surface out of the needle’s reference plane. A torque screwdriver costs less than one failed run.
Why a fully seated cap still fails
Septa thickness varies by supplier. A 1.0 mm PTFE/silicone septa and a 1.5 mm one place the needle entry point at different heights. If your method was validated on a 1.0 mm septa and you switch to a 1.5 mm septa without touching the needle depth parameter, the needle now enters 0.5 mm shallower. On a vial filled to the working volume, that can be the difference between drawing sample and drawing air. This is a fit problem disguised as a chemistry problem, and it shows up as a low area count rather than a hard error, which is why it takes longer to find.
The error codes each misalignment produces on common instruments
This is the part most troubleshooting guides skip. The error text tells you which interface failed if you know the mapping.
Agilent 1260/1290
- “Vial not found” or “No vial detected” at a specific position: gripper failed to close on the neck. Check tray height at that position first, then gripper jaw wear.
- “Gripper error” / “Gripper failed to close”: the jaws closed on nothing or on a tilted vial. Usually a carousel or tray seat issue, not the vial.
- “Needle error” / “Needle did not reach home”: the needle hit a high cap or a mis-seated septa. Check cap crimp diameter.
- “Draw error” / “Insufficient sample”: needle entered but drew air. Check septa thickness and fill volume, then vial height.
Thermo Vanquish / Ultimate 3000
- “Vial missing”: gripper or needle did not find the vial at the taught position. On Vanquish, this is often a tray half not fully latched.
- “Gripper position error”: the gripper reached the taught coordinates but the vial was not there. Re-teach the tray after any tray removal.
- “Needle blockage” or “Pressure limit”: frequently a partially seated cap that deflected the needle into the vial wall, not a true blockage.
Waters Alliance
- “Vial not detected”: carousel pocket tilt or a vial that is short of the 32 mm height tolerance (a 31.7 mm vial in a 32.0 mm seat).
- “Needle fault”: high cap or bent needle from a prior misalignment.
Shimadzu Nexera
- “Rack error” / “Vial not found”: rack not seated on the locating pins. Shimadzu racks are sensitive to partial seating and will fail at the far end of the rack first.
- “Needle overcurrent”: needle met an obstruction, usually a cap that is not fully crimped.
Notice the pattern. A hard “not found” at a position is a horizontal or vertical position error. A “needle” or “draw” error is a cap or septa height error. That split tells you which of the four interfaces to measure first.
Two field cases where the vial was innocent
Case 1: intermittent pickup at position 73 on an Agilent 1290
Symptom: a 96-vial run failed at position 73 roughly one run in three. Swapping the vial and the lot did not help. The error was “Vial not found.”
Measurement: depth gauge on the tray showed a 0.5 mm high spot at the rear-right corner. The tray locating pin was not fully home; a fragment of a broken vial had wedged under the tray edge. The rear row sat 0.5 mm high, right at the gripper’s compliance limit, so it gripped on good days and missed on bad ones depending on gripper temperature and spring tension.
Fix: removed the fragment, re-seated the tray, verified flatness under 0.2 mm across five points, re-taught the tray. No failures in the next 40 runs. The vial was never the problem, but the vial was the only thing being swapped.
Case 2: needle faults and low areas on a Thermo Vanquish
Symptom: needle faults every 20 to 30 injections, plus area counts 8 to 12 percent low on the affected vials. The lab had changed septa suppliers two months earlier.
Measurement: caliper across the crimp skirt on ten caps from the new lot read 11.4 to 11.6 mm, above the 11.3 mm loose-cap threshold. The caps were under-crimped because the new septa was 1.5 mm thick versus the 1.0 mm the crimper was set for, so the cap skirt could not close to the same diameter. The septa sat 0.4 mm high and the needle short-stroked, which explained both the faults and the low areas.
Fix: adjusted the crimper for the thicker septa, re-verified crimp diameter at 11.0 to 11.2 mm, and added a septa thickness check to the incoming inspection. Faults stopped. This is exactly the kind of interface problem where the sample vial and cap are blamed as a unit when the fault is the crimper setting.
A fit-and-alignment checklist you can run in 20 minutes
Run this in order. Stop at the first failure and fix it before continuing, because a tray error will mask a cap error.
- Tray flatness: depth gauge at four corners and center, no vials. Spread must be under 0.2 mm. Re-seat and re-check if not.
- Tray seating: 0.5 mm feeler gauge under each tray edge. No gap allowed.
- Gripper jaw gap: with jaws closed on a known-good vial neck, measure the jaw opening. Compare to the service manual spec (typically 8.0 to 8.4 mm on a crimp neck). Worn jaws read wide.
- Vial height: caliper ten vials base to top of cap. Must be 32.0 mm ±0.3 mm. Any vial outside is a lot problem.
- Crimp diameter: caliper across the skirt on ten caps. Target 11.0 to 11.2 mm. Spread under 0.2 mm.
- Screw cap torque: torque screwdriver on ten caps. Target 0.4 to 0.6 N·m.
- Septa thickness: caliper on five septa from the current lot. Match the method’s needle depth parameter.
- Re-teach the tray after any tray removal, and log the teach date. A tray that has been out and back in without a re-teach is a latent pickup error.
If all eight pass and you still get pickup errors, the fault is in the instrument’s motion system, not the consumables. That is a service call, not a vial order.
What to specify so misalignment stops being a recurring fault
The decision rule is simple: buy vials and caps to the GPI 12-32 dimensional standard with a stated tolerance, not a nominal dimension, and verify the tolerance on receipt. A datasheet that says “12 x 32 mm” tells you nothing. A datasheet that says 12.00 ±0.20 mm body, 32.00 ±0.30 mm height, neck 8.20 ±0.10 mm tells you whether the part will fit your gripper. The Aijiren dimensional specifications are published at that level, which is why I use them as a reference when auditing a new lot.
Pair that with the instrument maker’s own consumable guidance. Agilent publishes tray and gripper service limits in its chromatography consumables and columns documentation, and Thermo publishes sample handling geometry in its chromatography and sample handling resources. For method-level context on how the vial fits a validated procedure, the U.S. EPA SW-846 methods and the technical notes at Restek are useful cross-checks, though neither certifies a vial’s fit. For a broader view of the consumables that interact with the vial in the same run, the chromatography products catalog is a reasonable starting point.
One more specification worth writing into your purchase order: state the septa thickness and the cap skirt depth as controlled dimensions. Most pickup errors I have traced to a consumable trace back to a cap or septa that changed thickness between lots, not to the glass. The glass is the most stable part of the assembly. The cap is the least.
The takeaway rule: when an autosampler throws a pickup error, measure the tray flatness and the crimp diameter before you open a new vial box. If the tray is flat to 0.2 mm and the crimp is 11.0 to 11.2 mm, the vial is almost certainly in spec, and the fault is gripper wear or a tray that needs re-teaching. Swap the vial last, not first.
References & further reading
Related resources from our lab consumables network:
- Hplc Autosampler Vial at hplcautosamplervials.com
- Sample Vial at samplevialprice.com
- Chromatography Products at chromatographyselling.com
- Aijiren at aijirentech.com
External references and standards: