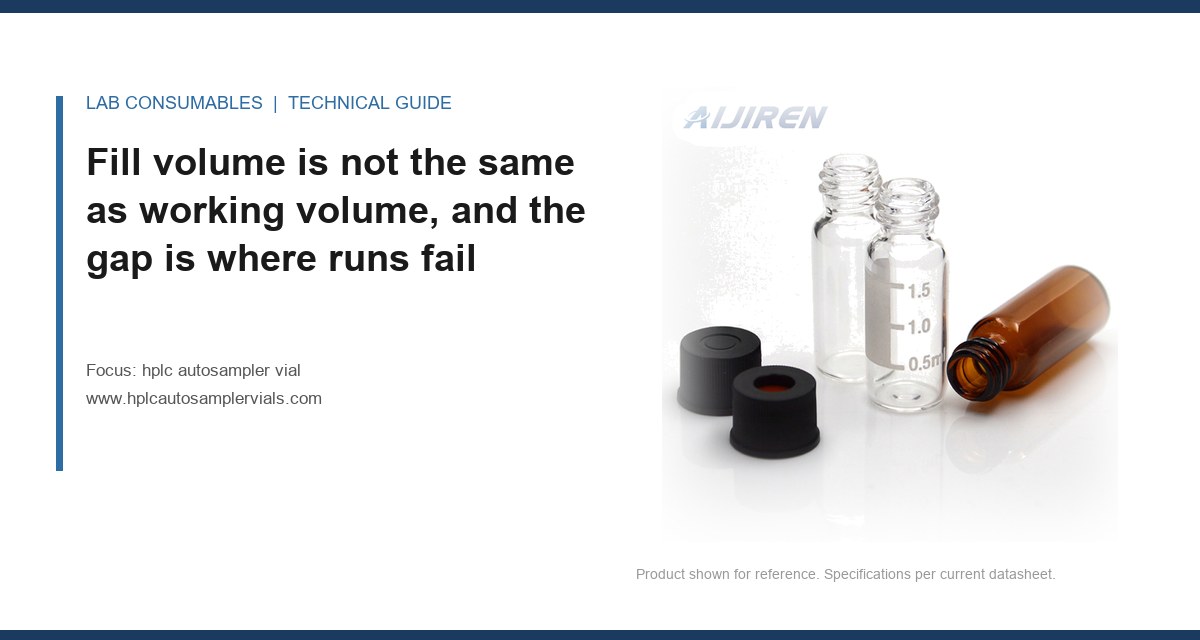
A 2 mL autosampler vial that has been punctured 11 times by a 22-gauge needle will still hold a seal on most septa, but the twelfth injection is where I have watched a run of 96 samples lose its last eight results to a coring failure that nobody caught until the sequence report printed. The vial was sized correctly for the sample. It was not sized correctly for the injection count. Those are two different calculations, and most labs only do the first one.
Sizing an HPLC autosampler vial for a given injection count means working three numbers in sequence: the fill volume you actually need per injection, the dead volume the needle cannot reach, and the puncture-life arithmetic that tells you when the septum, not the glass, becomes the limiting component. Get the first two right and the third will still bite you if you are running replicates from a single vial on a 96-position tray.
A standard 2 mL vial with a 12 × 32 mm body and an 11 mm crimp or screw neck holds about 1.8 mL usable. The label says 2 mL. The physical maximum with a septum in place is closer to 1.5 mL before you risk the needle hitting liquid on the septum during a short draw, or the vial overflowing when the autosampler needle displaces volume on the way down.
Working volume is what the autosampler can actually pull. For a bottom-draw needle that reaches within 1 mm of the base, the residual dead volume in a flat-bottom 2 mL vial is somewhere between 50 and 100 µL, depending on the vial’s internal geometry and the needle’s bevel. For a conical insert, dead volume drops to 15 to 25 µL. That difference is not cosmetic. If your method injects 20 µL and your autosampler needs a 100 µL draw to prime the loop and account for needle wash, then a 200 µL sample in a flat-bottom vial leaves you with 100 µL of usable liquid and exactly five injections before you are pulling air.
The arithmetic most labs skip: usable volume = fill volume − dead volume − (draw volume × injections). Solve for injections and you get the real capacity of that vial. A 500 µL fill in a flat-bottom vial with 80 µL dead volume and a 100 µL draw gives you four injections. The same 500 µL in a conical insert with 20 µL dead volume gives you nearly five. If you are running triplicates plus a standard, you are at the edge.
Why 1.5 mL is the practical ceiling for a 2 mL vial
Fill a 2 mL vial to 1.8 mL and cap it. The septum sits at roughly the 32 mm mark. The liquid is now within a few millimetres of the septum, and every time the needle penetrates, it pushes a small volume of air and vapour past the septum. On a vial that is nearly full, that displaced volume can carry liquid onto the septum surface. The next injection pulls a droplet of your sample from the septum into the needle, and you get a carryover peak that looks like contamination.
I keep fills at 1.0 to 1.5 mL for 2 mL vials. Below 1.0 mL, the dead-volume fraction becomes significant. Above 1.5 mL, you are inviting septum wetting. If you need more than 1.5 mL per vial, you need a larger vial, not a fuller one.
Dead volume scales with vial geometry, not with the label
Two vials both sold as “2 mL, 12 × 32 mm, 11 mm crimp” can have dead volumes that differ by 60 µL. The difference is the internal base: flat, rounded, or conical. It is also the needle length and the depth to which the autosampler drives it.
Agilent’s autosampler specifications, published in their consumables and instrument documentation, list the minimum sample volume for a standard draw on a 2 mL vial at around 100 to 150 µL depending on the model. That figure already includes the dead volume for their recommended vial geometry. Change the vial to a different base profile and the number changes. The instrument does not know.
Three geometry classes matter:
- Flat bottom, 2 mL: dead volume 60 to 100 µL. Cheapest. Fine for fills above 500 µL.
- Conical insert, 2 mL: dead volume 15 to 25 µL. Necessary below 300 µL fill. The insert adds cost per vial but saves sample.
- Short 1 mL vial (32 mm body, reduced height): dead volume 40 to 70 µL, but the tray position spacing may not match your autosampler. Check the tray drawing before you buy.
If you are running precious samples, the conical insert is not a luxury. It is the difference between recovering 250 µL and losing 90 µL of it. I have seen labs throw away 30% of a synthesized standard because they ran it in a flat-bottom vial to save $0.40 on consumables.
Puncture life is set by the septum, and the numbers are lower than most labs assume
This is the part of the sizing decision that most buying guides skip. A vial is not a single-use container in every workflow. On a tray running replicates, a standard curve, or a long kinetic sequence, the same vial gets punctured repeatedly. The glass will survive hundreds of punctures. The septum will not.
Septum puncture life depends on three variables: needle gauge, septum material and thickness, and the injection port’s needle-guide geometry. The published puncture counts from manufacturers are usually tested under ideal conditions (new needle, straight vertical entry, room temperature). Real-world counts are 60 to 80% of the published figure.
Needle gauge sets the puncture diameter, and the puncture diameter sets the seal
A 22-gauge needle has an outside diameter of 0.72 mm. A 26-gauge needle is 0.46 mm. A 27-gauge is 0.41 mm. Every puncture leaves a hole slightly larger than the needle because the silicone or rubber is displaced, not cut cleanly. That hole is the leak path.
Silicone-rubber septa, the standard for 11 mm crimp vials, hold a seal for roughly 50 to 100 punctures with a 22-gauge needle before the reseal becomes unreliable. With a 26-gauge needle, that climbs to 100 to 150. PTFE-faced silicone septa, the default in most labs, add a chemical barrier but do not extend puncture life; the PTFE is a film, not a structural layer. Pure PTFE septa, which some labs use for aggressive solvents, fail earlier, typically at 20 to 40 punctures, because PTFE does not reseal the way silicone does.
Here is the arithmetic most labs never run. If your method runs a 6-point calibration curve plus a blank plus 3 QC samples plus 90 unknowns, and each standard and QC is injected in triplicate from a single vial, then each of those vials sees 3 punctures. The unknowns, injected once each, see 1. But if you are running a stability study with 12 time points from a single vial, that vial sees 12 punctures. Add a needle wash that re-punctures the septum to flush, and you can double that count.
Puncture-life arithmetic for a real sequence
Take a 96-well tray, 22-gauge needle, silicone septum, 2 mL vials, one injection per vial. Total punctures across the tray: 96. Each vial sees 1. No issue. Now take the same tray with triplicate injections per vial: 288 punctures across 96 vials, 3 per vial. Still no issue. Now take a 12-point calibration where each standard is injected 5 times from the same vial, plus a 20-injection sequence on a single QC vial: that QC vial sees 20 punctures, and you are at 20 to 40% of the septum’s useful life in a single run.
The rule I use: if any single vial will be punctured more than 10 times in a sequence, either replace it mid-run or switch to a septum rated for higher puncture counts. For most silicone septa, that means replacing the vial at the 40 to 50 puncture mark, which is well before the manufacturer’s 100-puncture claim.
| Septum type | Thickness | Puncture life, 22G needle | Puncture life, 26G needle | Typical use |
|---|---|---|---|---|
| Silicone, 11 mm crimp | 1.0 mm | 50 to 100 | 100 to 150 | General HPLC, aqueous and polar solvents |
| PTFE-faced silicone | 1.0 mm (0.2 mm PTFE) | 50 to 90 | 90 to 140 | Most routine methods; chemical barrier |
| Pure PTFE | 0.5 to 1.0 mm | 20 to 40 | 40 to 60 | Aggressive solvents, short sequences only |
| Butyl rubber | 1.0 mm | 40 to 80 | 80 to 120 | Non-aqueous, low water permeability |
These numbers are field figures, not datasheet figures. Your instrument’s needle guide, the entry angle, and the septum’s age all shift them. Treat them as planning numbers and verify on your own system.
Two field cases where the wrong sizing decision cost a run
Case 1: the 25-injection QC vial that started leaking at injection 31
A contract lab running a 96-sample pesticide residue panel on an LC-MS/MS system had a QC vial that was injected every 10 samples as a system suitability check. That is 10 punctures per run, and the vial was reused across three runs before replacement. By the third run, the QC vial had seen 30 punctures. The symptom was a slow drift in QC response, about 4% RSD across the last four QC injections, with no corresponding drift in the calibration curve. The instrument was blamed first. The column was replaced. The ion source was cleaned.
The measurement that identified the problem was a simple one: a septum leak test. The lab pulled the QC vial, filled it with a volatile solvent, capped it, and weighed it at 0, 30, and 60 minutes. Mass loss was 0.8 mg over an hour, against 0.1 mg for a fresh vial. The septum was leaking. The fix was procedural: the QC vial was replaced every 20 punctures, which meant every two runs, and the RSD dropped to 1.6%. The lab also switched from a 22-gauge to a 26-gauge needle, which extended the replacement interval to every three runs.
Case 2: the 200 µL fill that ran dry at injection 4
A method development group was running a 6-point calibration from a 200 µL fill in a flat-bottom 2 mL vial, 20 µL injection, 100 µL draw. They expected three injections per vial. They got two, and the third pulled air. The autosampler flagged a short sample, but the sequence continued and the third point of the curve was lost.
The measurement: they weighed the vial before and after the run. The 200 µL fill had a dead volume of 85 µL (measured by drawing to dryness and weighing the residual). Usable volume was 115 µL. At a 100 µL draw, that is one injection, not three. The fix was two-part: switch to a conical insert (dead volume 20 µL) and increase the fill to 300 µL. That gave 280 µL usable, or two injections at 100 µL draw, or four at a 50 µL draw. They also reduced the draw volume by shortening the loop, which was the real win.
If you are sourcing inserts and vials together, the sample vial pricing and geometry data is worth checking against your dead-volume calculation before you commit to a tray configuration.
Needle gauge is a system decision, not a vial decision
You cannot size the vial without knowing the needle. A 22-gauge needle on a 1.0 mm silicone septum gives you roughly 50 to 100 punctures. A 26-gauge needle on the same septum gives you 100 to 150. The vial is the same. The arithmetic is not.
Needle gauge also affects dead volume. A finer needle has a smaller internal diameter, so the draw volume needed to prime the line is smaller. A 22-gauge needle at 50 mm length holds about 20 µL internally. A 26-gauge needle at the same length holds about 8 µL. If your autosampler primes the needle with sample before injection, that internal volume is part of your draw. Switching from 22-gauge to 26-gauge can reduce your per-injection draw by 10 to 15 µL, which extends the usable injections per vial by 10 to 15%.
The trade-off is needle rigidity. A 26-gauge needle bends more easily on a misaligned septum or a vial that is not seated in the tray. If your tray has any play in the vial seats, a 26-gauge needle will find it. Check the tray seating tolerance before you downsize the needle.
Temperature and solvent compatibility change the puncture count you can trust
A septum that holds 100 punctures at 22 °C in water will not hold 100 punctures at 40 °C in dichloromethane. Heat softens the silicone and accelerates compression set. Aggressive solvents swell the septum and enlarge the puncture. The published puncture count assumes room temperature and benign solvents.
For autosamplers with a thermostatted tray (4 °C or 40 °C), the puncture life of a silicone septum drops by roughly 20 to 30% at the cold end and 30 to 40% at the warm end. If you are running a 40 °C tray, plan on replacing vials at 30 to 40 punctures, not 50 to 100.
For solvent compatibility, the Restek technical resources publish septum compatibility tables that are more useful than most datasheets because they separate swell from chemical attack. A septum that swells 15% in your solvent will not reseal to the same puncture count.
A decision checklist for sizing a vial to an injection count
Work through this in order. Each step feeds the next.
- Step 1: count the maximum punctures any single vial will see in one sequence. Include calibration standards, QCs, and any replicate injections. Add 1 for a needle-wash puncture if your autosampler re-enters the vial to flush.
- Step 2: pick the septum based on that count. Under 20 punctures: any standard silicone or PTFE-faced silicone. 20 to 50: PTFE-faced silicone, 26-gauge needle if possible. Over 50: replace the vial mid-run or split the sequence across two vials.
- Step 3: calculate usable volume. Usable = fill − dead volume − (draw × injections). If usable is negative or under 50 µL, you are over-injecting from that vial.
- Step 4: pick the vial geometry from the fill volume. Fill above 500 µL: flat-bottom 2 mL. Fill 200 to 500 µL: conical insert. Fill under 200 µL: conical insert plus a reduced draw volume.
- Step 5: check the fill against the septum. Keep fills at 1.0 to 1.5 mL in a 2 mL vial. Above 1.5 mL, you risk septum wetting and carryover.
- Step 6: verify the tray. Confirm the vial height and diameter match the autosampler tray drawing. A 32 mm body in a tray designed for 32 mm is fine. A 32 mm body in a tray with 0.5 mm of play is a bent needle waiting to happen.
- Step 7: check the temperature. If the tray is thermostatted, reduce the puncture-life estimate by 20 to 40%.
If you are specifying vials, septa, and caps as a single line item for a method transfer, the chromatography products catalog and the Aijiren manufacturing documentation both publish the dimensional tolerances you need for Step 6. The GPI 11 mm neck finish (GPI 11-400) is the reference for crimp and screw caps on 2 mL vials; confirm your cap matches before you buy a case.
Troubleshooting when the vial was sized right but the run still failed
If you have done the arithmetic and the vial is still failing, check these in order:
- Short sample alarms on late injections: dead volume is higher than you calculated. Weigh the vial before and after a dry draw to measure it directly.
- Drifting QC response across a sequence: septum leak from puncture fatigue. Run the mass-loss test from Case 1.
- Carryover peaks that grow with fill volume: septum wetting. Reduce fill to 1.0 mL or switch to a conical insert.
- Bent needles on a specific tray position: tray seating or vial height mismatch. Measure the vial height with a caliper against the tray drawing; 0.3 mm of variance is enough to bend a 26-gauge needle.
- Ghost peaks that appear only after 30+ injections from one vial: septum coring. Inspect the septum under a loupe for a visible plug or a crescent-shaped tear.
The Thermo Fisher chromatography and sample handling documentation and the U.S. EPA SW-846 test methods both describe sample preservation and holding-time requirements that can force a larger fill volume than your dead-volume calculation would otherwise suggest. If the method requires a minimum volume for preservation or subsampling, that volume sets the floor, not the arithmetic.
The decision rule
Size the vial to the injection count, not to the sample volume. The sample volume tells you which vial geometry you need; the injection count tells you which septum and how often to replace it. Run the three numbers (fill minus dead volume minus draw times injections) before you commit a tray, and if any single vial will see more than 20 punctures in a sequence, replace it mid-run or switch to a 26-gauge needle and a PTFE-faced silicone septum. The glass will outlast the septum every time, and the septum is what fails first.
References & further reading
Related resources from our lab consumables network:
- Hplc Autosampler Vial at hplcautosamplervials.com
- Sample Vial at samplevialprice.com
- Chromatography Products at chromatographyselling.com
- Aijiren at aijirentech.com
External references and standards: