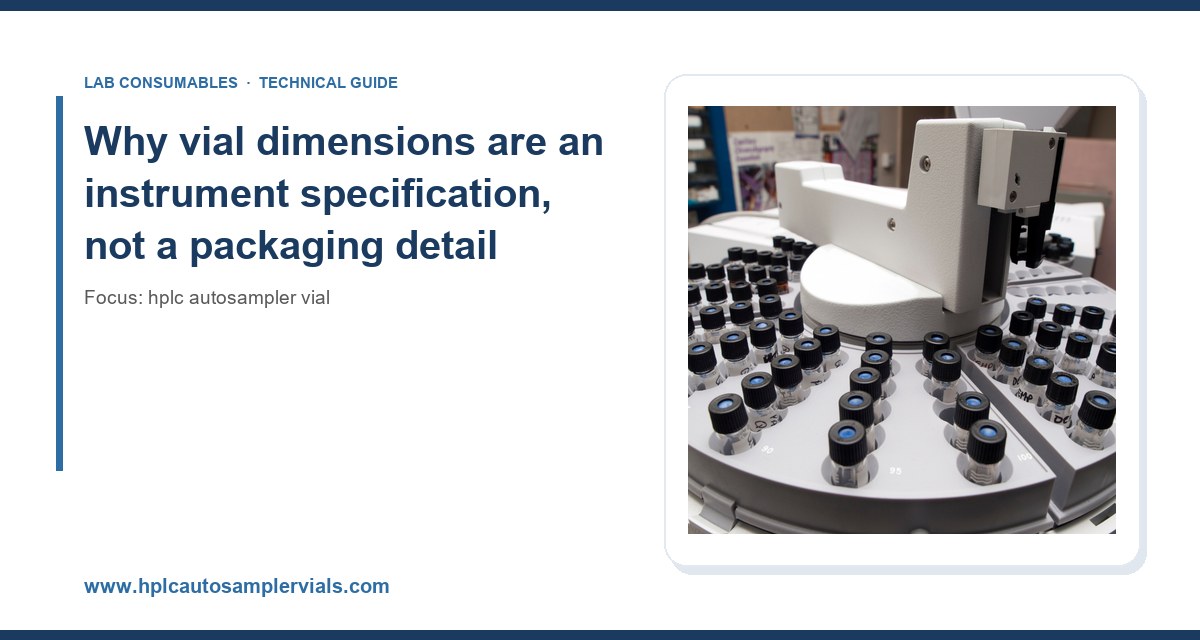
I have watched a lab spend three weeks chasing a “bad column” that turned out to be a 12 x 32 mm vial sitting in a tray bored for 11 mm vials. The needle found the septum most of the time, which is exactly what makes dimensional mismatches so expensive. You get intermittent failures, not a clean stop, and intermittent failures burn analyst time. This guide is about the least glamorous and most decisive part of vial selection: getting the physical envelope right for your specific autosampler or inlet.
An autosampler vial is a mechanical interface. The instrument’s gripper, needle guide, tray pocket, and inlet all assume a specific stack height, body diameter, and septum position. Deviate outside those tolerances and the failure shows up somewhere downstream: a bent needle, a short injection, a pressure spike, an “injection error” in the sequence log, or a vial that gets picked up and never returned to the tray.
The dimensions that matter are not just “2 mL.” They are:
- Body diameter: typically 11.6 mm or 12.0 mm for standard 2 mL vials, with 12 x 32 mm being the common nominal designation.
- Body height: nominal 32 mm for standard 2 mL, but real heights vary from about 31.5 to 32.5 mm across manufacturers, and that half-millimeter matters on short-travel grippers.
- Neck finish: 8-425 (8 mm thread, 425 neck), 9-425, 10-425, or 11 mm crimp (11 mm aluminum seal). These are not interchangeable.
- Overall height with cap or seal: this is the number most people forget. A crimped 11 mm seal adds roughly 3.0 to 3.5 mm above the glass rim. A screw cap adds 4.0 to 5.5 mm depending on cap style.
- Septum thickness and durometer: typically 1.0 mm silicone on 0.25 to 0.5 mm PTFE, with durometer in the 40 to 55 Shore A range for silicone.
If you buy vials by “2 mL clear screw top” and never check the neck finish or the capped height, you are relying on the vendor’s default, and the vendor’s default may not be your instrument’s default.
Matching dimensions to common autosampler families
Below is what I actually check before releasing a new vial lot into a validated method. These are working numbers, not marketing specs. Confirm against your own instrument’s user manual, because firmware updates and tray configurations change the tolerances.
Agilent 1100/1200/1260/1290 series (well plates and vial trays)
Agilent’s standard 2 mL tray accepts 12 x 32 mm vials with 11 mm crimp or 9-425 screw closures. The needle guide sits close to the septum, so overall capped height is the controlling dimension. I have seen 9-425 caps with thick septa push the stack above the guide and cause intermittent “no sample” errors. Stick to caps with a total capped height within ±0.5 mm of the reference vial. Agilent publishes dimensional drawings for its vials and caps at Agilent chromatography consumables and columns; use those drawings, not the catalog photo.
Thermo Scientific autosamplers (TriPlus, AS3000, and similar)
Thermo trays generally accept 12 x 32 mm vials but are less forgiving of body diameter variation. A 12.0 mm body in a pocket designed for 11.6 mm can bind on insertion, especially in the older AS3000 trays. The result is a vial that sits high, and the needle either short-samples or cores the septum. Thermo’s dimensional specifications are listed under Thermo Fisher chromatography and sample handling. If your method is validated on a TriPlus, buy vials with a stated diameter tolerance of ±0.1 mm and verify with calipers on receipt.
Waters Alliance and Acquity
Waters instruments are the ones I see most often confused by crimp versus screw. The Alliance tray can physically hold both, but the needle guide geometry is set for a specific capped height. A screw cap that adds 1 mm more than the crimp seal the method was validated with will not necessarily fail, but it will change the penetration depth. If your method is tight on injection volume or you are running small volumes (under 5 µL), that depth change shows up as RSD drift. I have measured RSD moving from 0.4% to 1.1% on a 2 µL injection after a cap swap. That is enough to fail a system suitability check.
Shimadzu SIL series
Shimadzu’s SIL-10, SIL-20, and SIL-30 trays are generally tolerant of 12 x 32 mm vials but sensitive to body height. A vial that is 0.5 mm tall can cause the gripper to drop it or fail to seat it. Shimadzu’s own vials are typically specified at 32.0 mm ±0.2 mm. If you are sourcing from a third party, ask for the height tolerance in writing. “Approximately 32 mm” is not a tolerance.
Older and non-standard inlets
If you are running a legacy instrument or a specialized inlet, the vial may be a 6 x 32 mm or 8 x 30 mm micro-vial, or a 10 x 32 mm wide-mouth. These are not interchangeable with standard 2 mL vials even if the volume is similar. The tray pocket and needle guide are sized to the body diameter. A 10 mm vial in a 12 mm pocket will wobble, and a wobbling vial is a coring risk.
Neck finish: the dimension that quietly breaks methods
Neck finish is where I see the most avoidable purchasing errors. The 8-425, 9-425, and 10-425 designations refer to the thread diameter and pitch. A cap for one will not seal another, and a “universal” cap is a compromise that seals none of them well.
- 8-425: common on older Agilent and some Shimadzu vials. Smaller opening, tighter needle target.
- 9-425: the most common screw-thread finish for 2 mL vials. Wide opening, easier needle entry, lower coring risk if the septum is correct.
- 10-425: used on some wide-mouth vials; check the cap torque spec, because the larger diameter changes the seal compression.
- 11 mm crimp: aluminum seal, requires a crimper. The seal height and crimp force are part of the method. Under-crimped seals leak; over-crimped seals deform the septum and increase coring.
The GPI (Glass Packaging Institute) thread standards are the reference for these finishes. If a vendor cannot tell you which GPI finish their vial uses, that is a red flag. I have seen a “9-425” cap from one supplier fail to seal a “9-425” vial from another because the thread pitch was off by a fraction. The leak showed up as evaporative loss over a 24-hour run, not as an obvious failure. If you are running long sequences, buy vial and cap from the same lot and verify seal integrity with a weight-loss check on a few vials before committing.
Septum thickness, durometer, and the penetration-depth question
Septum selection is usually treated as a chemical compatibility question. It is also a dimensional one. A septum that is too thick changes the effective capped height and the needle penetration depth. A septum that is too soft cores more easily; too hard and the needle bends.
For standard 2 mL vials, I default to 1.0 mm silicone / 0.25 mm PTFE for aqueous and polar solvents, and 1.0 mm silicone / 0.5 mm PTFE where solvent resistance matters more than needle life. Durometer in the 45 to 55 Shore A range is a reasonable working target. Below 40 Shore A, coring risk rises sharply; above 60, needle bending becomes the failure mode.
Penetration depth is set by the instrument, not the vial, but the vial stack determines where the needle actually lands. If you change cap style and the capped height changes by 1 mm, the needle penetrates 1 mm deeper or shallower. Shallow penetration means the needle tip sits in the septum, which causes short samples and coring. Deep penetration means the needle tip can hit the bottom of the vial, which bends it. The fix is to re-teach the vial height after any cap change, and to verify with a test injection before releasing the method.
A decision checklist for matching vial to instrument
This is the checklist I use when qualifying a new vial SKU. It takes about 20 minutes and has saved me more time than any other single procedure.
- Body diameter: measure 10 vials with calipers. Accept only if all are within ±0.1 mm of the instrument spec (typically 11.6 or 12.0 mm).
- Body height: measure 10 vials. Accept only if all are within ±0.2 mm of the spec (typically 32.0 mm).
- Capped height: measure 10 capped vials. Accept only if the range is under 0.5 mm total spread. A wider spread means the cap or septum is inconsistent.
- Neck finish: confirm the GPI designation in writing. Do not accept “standard 9 mm” as a specification.
- Septum thickness: confirm 1.0 mm silicone with the PTFE thickness stated. Reject any vendor who will not give you the durometer.
- Crimp integrity (if crimp): check seal height with a crimp gauge. Target the instrument’s specified crimp dimension, typically within 0.2 mm.
- Screw cap torque (if screw): hand-tight plus a quarter turn is the usual working spec. If you use a torque tool, 0.4 to 0.6 N·m is a reasonable starting range for 9-425 caps; verify against the cap manufacturer’s spec.
- Puncture count: run a septum to failure on your needle gauge. A 22-gauge needle on a 1.0 mm silicone septum typically gives 3 to 5 clean punctures before coring risk rises. Plan your method around that, not around the vendor’s “multi-puncture” claim.
- Tray fit: load a full tray and run a dry cycle. Any vial that binds, wobbles, or sits high is a reject.
- Injection precision: run 10 injections of a standard and check RSD. A change of more than 0.3% from your reference vial is a flag.
If you want a broader view of how these dimensions interact with the rest of the sample path, the HPLC autosampler vial reference page on this site covers the dimensional families in more detail. For pricing and volume comparisons across suppliers, Sample Vial is a useful cross-check before you commit to a lot.
Temperature, pressure, and the dimensions that change under load
Dimensions are not static. A vial at 4 °C in a cooled autosampler tray has a slightly different body diameter than the same vial at 25 °C, though the change is small (borosilicate glass has a low coefficient of thermal expansion, on the order of 3.3 x 10⁻⁶ /°C). The bigger issue is the cap and septum. Silicone softens at elevated temperature, and a septum that is 1.0 mm at room temperature can compress to 0.9 mm at 60 °C, which changes the seal and the penetration depth.
For high-temperature methods, specify a septum rated for the temperature. Standard silicone/PTFE is good to about 200 °C for short excursions, but the practical working limit for repeated injections is lower. If your inlet is running at 250 °C or above, use a high-temperature septum and verify the capped height at temperature, not just at ambient.
Pressure matters too. A sealed vial under positive pressure from a pressurized autosampler can deform the septum upward, which changes the effective penetration depth. If you are running headspace or pressurized sampling, check the vial’s pressure rating with the vendor. Most standard 2 mL vials are rated to about 1.5 bar; beyond that, you need a pressure-rated vial and cap.
Troubleshooting checklist for dimensional mismatches
When a method starts failing intermittently, work through this list before you blame the column.
- Symptom: bent needles. Check body height and capped height first. A vial that is 0.5 mm tall can cause the needle to hit the bottom. Measure 10 vials from the current lot.
- Symptom: coring (septum particles in the vial). Check septum durometer and needle gauge. A 22-gauge needle on a 40 Shore A septum will core faster than on a 50 Shore A septum. Also check penetration depth: a shallow needle sits in the septum and tears it.
- Symptom: short injections or “no sample” errors. Check neck finish and cap seal. A mismatched cap can leak, and a leaking vial under vacuum will not deliver the expected volume. Weigh a few vials before and after a 24-hour run to check for evaporative loss.
- Symptom: vial picked up but not returned. Check body diameter against the tray pocket. A 12.0 mm vial in an 11.6 mm pocket will bind. Measure the pocket with a pin gauge if you have one.
- Symptom: RSD drift on small injections. Check capped height consistency. A 0.5 mm spread across the lot changes penetration depth and therefore the sample volume. Re-qualify the lot or switch suppliers.
- Symptom: intermittent pressure spikes. Check for a partially cored septum blocking the needle. Inspect the septum after a run; a clean puncture is a small round hole, a cored septum has a torn or displaced flap.
For method-specific tolerances, the U.S. EPA SW-846 test methods for waste and materials are a useful reference for how sample handling and vial integrity are specified in regulated work. For general chromatography technique and dimensional guidance, Restek technical resources for chromatography has practical notes that go beyond the catalog.
What I recommend, with numbers
For a standard reversed-phase HPLC method on a modern autosampler, I specify:
- Vial: 12 x 32 mm clear borosilicate, 9-425 screw thread, body diameter 12.0 mm ±0.1 mm, body height 32.0 mm ±0.2 mm.
- Cap: 9-425 polypropylene screw cap with 1.0 mm silicone / 0.25 mm PTFE septum, durometer 45 to 55 Shore A.
- Capped height: within 0.5 mm total spread across the lot.
- Torque: hand-tight plus a quarter turn, or 0.4 to 0.6 N·m if using a torque tool.
- Puncture plan: single puncture per vial for quantitative work; if you must re-puncture, limit to 3 punctures on a 22-gauge needle and verify RSD.
For crimp methods, substitute an 11 mm aluminum seal and verify crimp height with a gauge to within 0.2 mm of the instrument spec. For high-temperature or pressurized sampling, move to a high-temperature septum and confirm the pressure rating with the vendor.
If you are sourcing across multiple instrument families, keep the neck finish and capped height consistent across your SKUs where possible. It reduces the number of variables in your method transfer and makes troubleshooting faster. The Chromatography Products catalog is a reasonable place to compare dimensional families side by side, and Aijiren publishes dimensional drawings for its vial and cap lines that are worth checking against your instrument manual before you commit to a lot.
Takeaway
Vial dimensions are an instrument specification. Match body diameter, body height, neck finish, capped height, and septum thickness to your autosampler or inlet, verify with calipers on receipt, and re-teach the vial height after any cap change. A 0.5 mm dimensional error is enough to cause intermittent failures that look like column problems. Measure first, then buy.
References & further reading
Related resources from our lab consumables network:
- Hplc Autosampler Vial at hplcautosamplervials.com
- Sample Vial at samplevialprice.com
- Chromatography Products at chromatographyselling.com
- Aijiren at aijirentech.com
External references and standards: