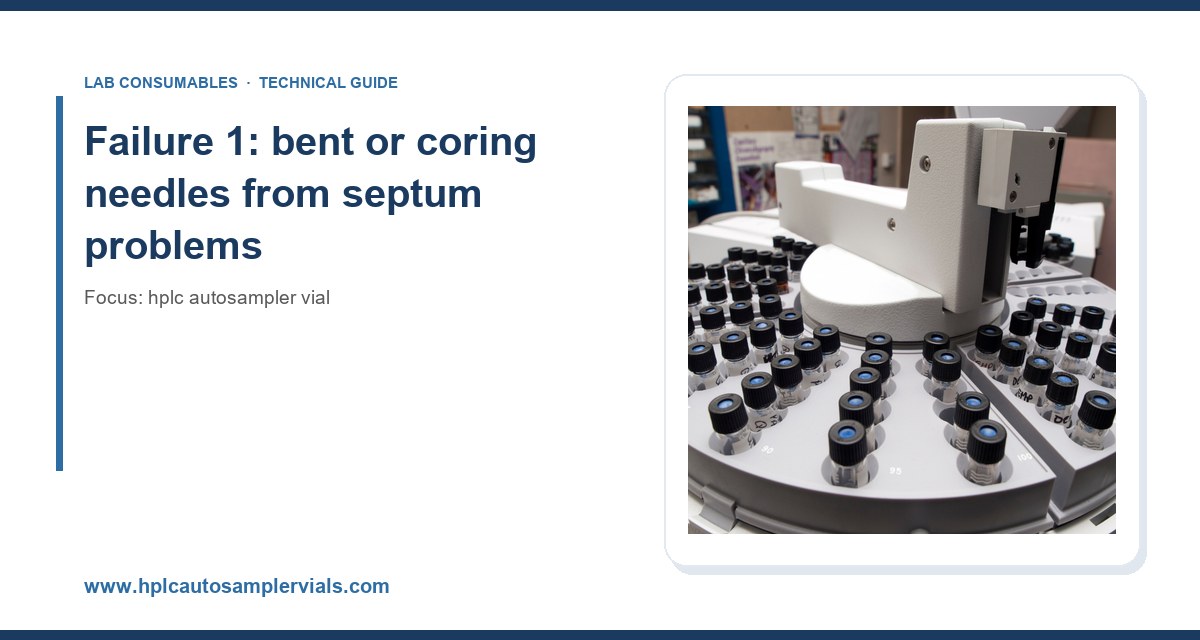
I have watched a vial ruin a 96-well run at 2 a.m. more times than I care to count. The autosampler logs a “missing vial” error on position 47, the sequence aborts, and the analyst who prepared the plate is already home. Nine times out of ten the culprit is not the instrument. It is a cap that backed off, a septum that corkscrewed, or a vial that was never quite the right dimension for the tray. This article is about those failures, the root causes behind them, and the specific numbers and habits that prevent them.
Vials look like commodity parts. They are not. A 2 mL autosampler vial is a precision-molded borosilicate container with a controlled neck geometry, a crimp or screw finish, and a septum that has to survive needle strikes without shedding silicone into your sample. Get any of those wrong by a few tenths of a millimeter and the instrument will tell you about it, usually at the worst possible time. Below is the failure taxonomy I use when training new lab staff, drawn from roughly fifteen years of running these consumables through HPLC, GC, and LC-MS systems from Agilent, Waters, Shimadzu, and Thermo.
Septum coring is the single most common vial-related failure I deal with. The needle punches a disc out of the septum and pushes it into the vial, or it drags a sliver of silicone into the needle bore. The symptoms are easy to recognize once you know them: a sudden flat baseline on one injection, a pressure spike from a partial blockage, or a ghost peak at a retention time that does not match any standard.
What actually causes coring
Three things drive it. First, needle gauge versus septum hardness. A standard 22-gauge needle (0.72 mm OD) punching a 70 Shore A silicone/PTFE septum will core if the needle tip is blunt or burred. A 26-gauge needle (0.47 mm OD) is gentler but flexes more, and a flexing needle can tear rather than pierce. Second, needle depth. If the autosampler is set to pierce below the septum into the vial body, the needle shoulder can shave the septum edge. Third, and most overlooked, septum re-use. A pre-slit septum rated for a limited number of punctures will core predictably once you exceed that count.
The numbers that matter
Standard non-pre-slit silicone/PTFE septa are typically rated for 3 to 5 punctures before coring risk rises sharply. Pre-slit septa can handle more, but the slit itself is a leak path. For a 96-position plate where each well is injected once, a standard septum is fine. For a tray where the same vial is injected 10 times (method development, stability timepoints), switch to a pre-slit septum or accept that you will be changing septa mid-run. I keep a log of puncture counts per vial on method-development benches. It sounds obsessive until you trace a ghost peak back to a cored septum on injection 9.
Septum temperature rating is the other number people ignore. Standard silicone/PTFE septa are good to about 200 °C in short excursions. If your GC inlet runs at 250 °C, you need a high-temperature septum or you will get bleed and, eventually, a melted septum face that seals the needle. For HPLC at ambient or 40 °C, this is a non-issue, which is why LC analysts often forget it exists until they move to GC.
Prevention
- Inspect needle tips under a loupe every 500 injections. A burred tip cores septa at roughly triple the rate of a clean one.
- Set needle penetration so the tip sits 1 to 2 mm below the septum underside, not at the bottom of the vial.
- Use pre-slit septa for multi-injection workflows; use standard septa for single-injection plates.
- Match septum hardness to needle gauge: 70 Shore A for 22-gauge, softer for 26-gauge.
- Replace septa on a schedule tied to puncture count, not to calendar time.
Failure 2: cap loosening and evaporation during long runs
A screw cap that backs off by half a turn is a slow-motion disaster. The vial still sits in the tray, the autosampler still finds it, but the headspace is no longer sealed. Volatile analytes evaporate, concentrations drift upward for non-volatiles as solvent leaves, and the injection volume the instrument thinks it delivered is not the volume the needle actually pulls.
Root cause: torque and thread engagement
The failure is nearly always under-torque or over-torque. Under-torque leaves the cap loose enough that vibration from the autosampler transport mechanism walks it back. Over-torque deforms the septum and can strip the thread or crack the neck. The right answer for a standard 9 mm screw vial is a hand-tight plus a quarter turn, which corresponds to roughly 0.6 to 0.9 N·m on a torque wrench. Most people have no idea what that feels like, so I tell them: firm, not white-knuckle. If your fingertips are pale, you are over-torquing.
The 9 mm versus 11 mm question
This trips up new labs constantly. A 9 mm screw thread is the standard for 2 mL autosampler vials and is what most modern HPLC autosamplers expect. An 11 mm crimp finish is the older standard, still common on GC and on some legacy LC systems. They are not interchangeable. Putting a 9 mm cap on an 11 mm vial will feel like it threads, then leak. Putting an 11 mm cap on a 9 mm vial will not seat at all. Check your autosampler tray spec before you order, and standardize across the lab so nobody grabs the wrong box at midnight.
Prevention
- Standardize on one finish (9 mm screw is my recommendation for LC) and label storage drawers accordingly.
- Use a torque-limiting capper if you run more than 100 vials a day. It removes the human variable.
- For runs longer than 24 hours, check cap tightness at the midpoint or use a vial with a bonded septum cap.
- Store prepared vials at 4 °C and cap them immediately; do not leave open vials on the bench while you prepare the next one.
Failure 3: vial dimension mismatch and tray jams
This one is purely dimensional, and it is entirely preventable. Autosampler trays are machined to accept a specific vial footprint: 12 x 32 mm for a standard 2 mL vial, with a neck OD of about 11 mm at the crimp and a body OD of 12 mm. If your vial is 11.6 mm at the body, it will wobble in the tray and the gripper may miss it. If it is 12.4 mm, it will jam. Both errors happen with cheap, non-spec vials.
What “GPI” and “ISO” mean here
The dimensional standards that matter are the GPI (Glass Packaging Institute) finish specifications for the neck and thread, and the ISO 4796 series for laboratory glassware dimensions. A vial that meets GPI 9 mm finish will thread correctly on a GPI 9 mm cap. A vial that merely “looks like” a 9 mm vial may have a thread pitch that is 0.1 mm off and will cross-thread under torque. I have seen a batch of no-name vials where the neck OD ran 0.3 mm oversize; they jammed every third position on a Shimadzu tray. The instrument was fine. The vials were not.
Prevention
- Buy from a supplier who publishes dimensional tolerances. A reputable HPLC autosampler vial spec sheet will list body OD, height, neck OD, and thread finish.
- Spot-check incoming lots with calipers: body OD 12.0 ± 0.1 mm, height 32.0 ± 0.2 mm.
- Never mix vial brands in a single tray. Gripper calibration is set for one geometry.
- Keep a “known good” reference vial on the bench to compare against new lots.
Failure 4: sample adsorption and carryover
Not every failure is mechanical. Some analytes stick to the glass. Basic compounds, peptides, and certain pesticides adsorb to the silanol groups on untreated borosilicate. The result is a low first injection, a rising trend across the run, and a carryover peak in the blank. I have seen a 15% response loss on a first injection of a basic drug in a plain glass vial, recovered entirely by switching to a deactivated glass vial.
Glass grade and deactivation
Type I borosilicate (the standard for autosampler vials) has low alkali leaching and is appropriate for most work. For adsorptive analytes, use a vial with a covalently bonded deactivation layer. For trace metals analysis, use a vial that has been acid-washed and certified low-leach. For PFAS work, the vial must be polypropylene, because glass and the PTFE-lined septum can both contribute background. Know your analyte class before you pick the vial.
Prevention
- Run a carryover check: inject blank, standard, blank. Carryover above 0.1% of the standard response needs attention.
- Use deactivated glass for basic or polar analytes; use polypropylene for PFAS and trace metals.
- Rinse the needle with a stronger solvent between injections if your method allows.
- Keep sample pH within the vial’s recommended range; extreme pH attacks the glass surface and increases adsorption.
Failure 5: particulates and precipitate blocking the needle
A partially blocked needle is sneaky. The autosampler reports a successful injection, but the volume delivered is short. Peak areas drift down across the run. If you are running a gradient, the drift looks like a method problem, and analysts spend days chasing mobile phase before someone pulls the needle and finds a plug of precipitated sample.
Root causes
Precipitation from solvent mismatch is the usual suspect: a sample dissolved in a strong solvent injected into a weaker mobile phase, or a sample stored cold that crashes out. The other cause is filtration. A sample that was never filtered, or filtered through a membrane that shed fibers, will deposit particulates in the needle and the vial bottom. A 0.22 µm or 0.45 µm syringe filter is standard; use the smaller pore for LC-MS and the larger for straightforward HPLC.
Prevention
- Filter every sample through a 0.22 µm membrane before it goes in the vial.
- Match sample solvent to mobile phase strength; if you must inject a strong solvent, reduce injection volume.
- Do not store prepared vials below the sample’s solubility limit; check for precipitate before loading the tray.
- Inspect the vial bottom under light before capping; a cloudy vial is a wasted injection.
Failure 6: light and temperature degradation during the run
Some analytes degrade in the tray while they wait. Vitamins, certain antibiotics, and many natural products are light-sensitive. If your run is 8 hours and the tray sits at bench temperature under fluorescent lights, the last injection is not the same sample as the first. The chromatogram shows a declining peak and a growing degradant peak, and the analyst blames the column.
Amber vials and tray cooling
Amber glass blocks most of the UV and visible range and is the first line of defense. For temperature, many modern autosamplers have a cooled tray that holds 4 to 10 °C. Use it. For analytes sensitive to both, combine amber vials with a cooled tray and shorten the run if possible. I have also seen labs wrap the tray in foil, which works but looks terrible and can interfere with the tray sensor. Amber vials are the cleaner fix.
Prevention
- Use amber vials for light-sensitive analytes; clear vials only when you have confirmed stability.
- Set the tray cooler to 4 °C for long runs and stability studies.
- Run a stability check: inject the same vial at the start and end of the run and compare areas. A drop above 2% means the sample is degrading in the tray.
- Prepare only as many vials as the run needs; do not pre-make a week’s worth.
Failure 7: contamination from septum bleed and cap materials
Septum bleed shows up as a rising baseline or as siloxane peaks in GC-MS at m/z 73, 147, and 207. In LC-MS, the culprit is often plasticizer from the cap or the vial’s plastic components. The failure is not dramatic; it is a slow erosion of sensitivity and a growing forest of background peaks that eventually masks your analyte.
Material choices
For GC-MS, use a septum with a low-bleed silicone formulation and a PTFE face on the sample side. For LC-MS, avoid caps with soft plastic liners that leach phthalates. For trace analysis, use vials that are certified for the background level you need. The difference between a generic cap and a low-bleed cap can be an order of magnitude in background at the low mass range.
Prevention
- Run a system blank with a fresh vial and cap; if background is high, change the cap lot.
- Use PTFE-faced septa for GC-MS; use low-bleed caps for LC-MS.
- Store caps in their original packaging, away from solvents and heat.
- Do not re-use caps; the septum deforms and the seal degrades.
A field troubleshooting checklist
When a run fails, work through this list in order. It saves time compared with pulling the instrument apart first.
- Check the error code. “Missing vial” is dimensional or tray-related. “Needle error” is septum or blockage. “Pressure error” is blockage or leak.
- Inspect the septum. Look for a punched disc, a corkscrew, or a slit that has grown. Replace if in doubt.
- Check cap torque. Hand-tight plus a quarter turn. If it spins freely, it was loose.
- Measure the vial. Body OD 12.0 ± 0.1 mm, height 32.0 ± 0.2 mm. Compare against a known good vial.
- Run a blank. A ghost peak means carryover or contamination. A flat baseline on a sample means a blocked needle.
- Check sample stability. Inject the same vial twice with a delay; a drop above 2% means degradation.
- Check particulate. Hold the vial to the light. Cloudy means filter and re-prepare.
- Check the needle. Loupe inspection for burrs; replace every 500 injections.
Decision checklist: choosing the right vial for the job
Use this table when specifying a vial for a new method. The numbers are the ones I actually use.
- Standard reversed-phase HPLC, ambient tray: 2 mL clear Type I borosilicate, 9 mm screw, silicone/PTFE septum, 12 x 32 mm. Rated to 200 °C septum excursion.
- Multi-injection method development: same vial, pre-slit septum, replace after 10 punctures.
- Light-sensitive analytes: amber glass, same dimensions, cooled tray at 4 °C.
- Basic or adsorptive analytes: deactivated glass, same dimensions.
- PFAS or trace metals: polypropylene vial, certified low-leach, no PTFE contact.
- GC with high-temperature inlet: 11 mm crimp, high-temperature septum rated above 250 °C.
- Long runs over 24 hours: bonded septum cap, torque-checked, cooled tray.
For a broader look at how these consumables fit into a full workflow, the sample vial catalog and the chromatography products index are useful references. For instrument-specific guidance, the manufacturer resources from Agilent and Thermo Fisher publish tray and needle specifications that tell you exactly what geometry your autosampler expects. For method-level context on regulated work, the U.S. EPA SW-846 methods and the technical notes at Restek are worth reading before you lock a vial into a validated method.
What I recommend
Standardize on a 9 mm screw-thread, 2 mL clear Type I borosilicate vial, 12 x 32 mm, with a silicone/PTFE septum for LC work, and keep a parallel stock of amber vials for light-sensitive methods and polypropylene vials for PFAS and trace metals. Buy from a supplier who publishes dimensional tolerances and septum ratings; the few cents per vial you save on no-name stock is not worth the 2 a.m. run failure. If you run more than 100 vials a day, buy a torque-limiting capper and a needle inspection loupe. Those two tools eliminate most of the failures in this article. For a supplier that publishes the specs, Aijiren is one I have used and can vouch for on dimensional consistency.
The takeaway is simple: vial failures are almost never random. They trace back to a specific dimension, a torque value, a puncture count, or a material choice. Measure the vial, count the punctures, torque the cap, and match the material to the analyte. Do those four things and the autosampler will stop being the thing that wakes you up at night.
References & further reading
Related resources from our lab consumables network:
- Hplc Autosampler Vial at hplcautosamplervials.com
- Sample Vial at samplevialprice.com
- Chromatography Products at chromatographyselling.com
- Aijiren at aijirentech.com
External references and standards: