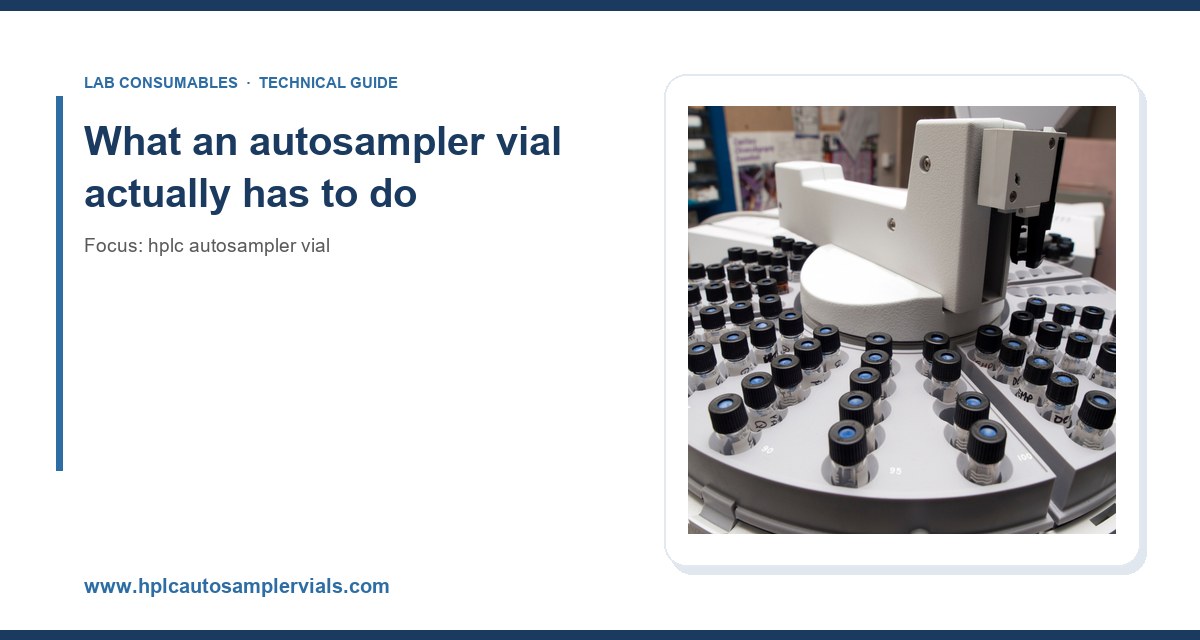
I have watched a lab lose three weeks of method validation because someone bought 9 mm vials with 6 mm necks and tried to run them on a 2 mL autosampler tray set up for 11 mm crimp caps. The instrument kept throwing “vial not detected” errors, the needle bent twice, and the root cause was a purchase order that said “2 mL clear vials, qty 1000” with no other detail. That is the entire problem in one sentence: the autosampler vial is the cheapest component in the system and the one most likely to stop the run. This guide is what I would hand a new buyer or a lab manager who wants to stop re-learning that lesson.
A vial is not a container. In an HPLC autosampler it is a mechanical interface with three jobs: hold a defined liquid volume at a defined geometry so the needle reaches the right depth, seal that volume against evaporation and contamination for the length of a run sequence, and survive the handling of a robotic arm that does not care about your sample. Everything else (glass type, cap color, labeling) is secondary to those three.
The geometry matters more than most people expect. A standard 2 mL, 12 x 32 mm vial with a 6 mm neck opening is the de facto industry format, and it is the one defined in the GPI 12-32 finish standard (GPI is the Glass Packaging Institute thread and finish specification, and 12-32 means 12 mm neck diameter, 32 mm body height). The neck finish is what the cap threads onto, and it is also what the autosampler gripper references. If the neck is 6 mm versus 8 mm, or the thread is a crimp versus a screw, the tray position may still accept the vial but the needle path will be wrong.
I keep a caliper on the bench. When a new lot arrives I measure ten vials: body diameter, height, neck OD, and neck ID. Tolerance on a decent lot is ±0.2 mm on body diameter and ±0.5 mm on height. A cheap lot that drifts to ±0.8 mm on height will start jamming in a 100-position tray around vial 60, and you will blame the autosampler firmware. It is not the firmware.
The format decision: 2 mL, 4 mL, or micro-volume
Standard 2 mL, 12 x 32 mm
This is the default for a reason. It fits nearly every autosampler made in the last 30 years: Agilent 1100/1200/1260/1290 series, Waters Alliance and ACQUITY, Shimadzu Prominence and Nexera, Thermo Vanquish and UltiMate, and the Dionex and Hitachi lines. It holds enough sample for a 20 µL injection with plenty of dead volume, and it is cheap enough to use once and throw away. If you are starting a method from scratch and you control the vial choice, use this format. See the range at Hplc Autosampler Vial.
The catch is dead volume. A 2 mL vial with a 6 mm neck and a standard crimp cap holds roughly 150 to 250 µL below the needle tip when filled to the 1.5 mL line. If your method injects 5 µL from a 100 µL sample, that is fine. If you are running a precious 80 µL prep, you are leaving most of it unreachable. That is when you move to a conical insert or a different format.
4 mL, 15 x 45 mm
Used on older Agilent 1050/1090 trays and some preparative and fraction-collection setups. The larger body gives more headspace and is friendlier for samples that outgas or foam. It is not interchangeable with 2 mL trays. Do not buy 4 mL vials because they were on sale unless your tray is actually a 4 mL tray.
Micro-volume and 12 x 32 mm with inserts
When sample volume is under 200 µL, a 150 µL or 250 µL glass insert inside a standard 2 mL vial is the usual answer. The insert has a conical bottom that lets the needle reach within 1 to 2 mm of the base. Two rules I follow: use a polymer foot (the small plastic spring at the base) so the insert sits centered, and never mix insert brands with vial brands without checking the seated height. A 250 µL insert that sits 2 mm too high loses 20 µL of reachable volume, which is 8% of your sample.
For very small volumes (under 50 µL) there are dedicated micro-vials, often 6 x 32 mm or 8 x 30 mm, but they require a specific tray adapter. They are worth it only if you are running nanoflow or capillary LC where every microliter counts.
Glass: clear, amber, and the silanization question
Clear Type I borosilicate glass is the default. It has low extractables, good chemical resistance, and you can see the sample. Use it unless you have a reason not to.
Amber glass blocks UV and visible light and is the right choice for photosensitive analytes: vitamins (retinol, riboflavin), many pesticides, some antibiotics, and anything with a conjugated double-bond system that isomerizes under light. Amber costs about 15 to 25% more than clear. In my experience it is worth it for any method that sits on an autosampler for more than 8 hours under lab lighting. A clear vial on a 12-hour sequence can lose 2 to 5% of a light-sensitive peak, and you will chase that as an “injection precision” problem for a week.
Silanized (deactivated) glass is for analytes that adsorb to the silanol groups on untreated glass: basic compounds, some proteins and peptides, and certain polar pesticides. The silanization coats the surface with a hydrophobic layer that reduces adsorption. It costs 2 to 3 times more than plain glass. Use it when you see tailing or low recovery on a basic analyte that is fine in a different container. Do not use it as a default; it is a fix for a specific problem.
One more glass note: Type I borosilicate is the standard, but some budget vials use Type III soda-lime glass. Type III leaches alkali into aqueous samples over time and can shift pH by 0.2 to 0.5 units over 24 hours. For pH-sensitive methods, check the glass type on the certificate of analysis. If the supplier cannot tell you, that is your answer.
Caps and septa: where most failures actually happen
The septum is the part the needle punctures, and it is the part that fails first. A septum has a finite puncture count. After that it coring (shedding a plug of silicone into the sample) or leaks. I have seen septa fail at 30 punctures and I have seen them last 200. The difference is material and needle gauge.
Crimp versus screw thread
Crimp caps (11 mm or 20 mm aluminum seals with a septum) give the best seal and the lowest evaporation rate, but they require a crimper and a decapper, and the crimp force matters. A properly crimped 11 mm cap on a 12 x 32 mm vial should be crimped to a consistent seal with no more than 0.5 mm of cap skirt distortion; over-crimping cracks the glass neck, under-crimping leaks. I use a torque-style crimper and check the first five of every lot by hand. Crimp vials are the right choice for long sequences (12+ hours) and for volatile solvents like dichloromethane or pentane.
Screw thread caps (9 mm or 10-425) are faster, need no tools, and are re-sealable. They are the right choice for high-throughput labs where techs cap hundreds of vials a day. The tradeoff is slightly higher evaporation and a real risk of cross-threading. A 9 mm screw cap should be tightened to hand-tight, roughly 0.5 to 0.8 N·m; a torque screwdriver set to 0.6 N·m is cheap insurance. Over-tightening deforms the septum and creates a leak path; under-tightening lets solvent escape. If you use screw caps, buy a torque driver and train on it.
Septum material
This is where the money is. The common septum materials and what they are for:
- Silicone: excellent reseal, high puncture tolerance (often 100+ punctures), but high bleed and high gas permeability. Fine for aqueous samples, poor for trace GC-MS.
- Silicone/PTFE faced: PTFE on the sample side reduces bleed and chemical attack; silicone provides the reseal. The workhorse for HPLC. Expect 50 to 100 punctures before coring risk rises.
- PTFE/silicone/PTFE (sandwich): PTFE on both faces, silicone core. Lower bleed than single-faced, good for sensitive detectors. Slightly harder to puncture cleanly.
- Butyl rubber: low gas permeability, used for headspace and GC. Poor reseal after multiple punctures.
- Natural rubber / red rubber: cheap, high extractables. Avoid for anything trace.
Pre-slit septa are worth mentioning. A slit lets the needle pass without coring, which extends septum life and reduces the chance of a plug entering the sample. The tradeoff is higher evaporation. For short sequences (under 4 hours) and high-throughput work, pre-slit is a good default. For overnight runs, use a solid septum and accept the lower puncture count.
Needle gauge matters too. A 22-gauge needle (0.72 mm OD) cores a septum faster than a 26-gauge (0.46 mm OD). If your autosampler uses a 22-gauge needle, budget for more frequent septum changes or switch to pre-slit. I have seen a 22-gauge needle core a cheap septum at puncture 25; the same needle on a PTFE-faced septum went past 80.
Chemical compatibility: the short list
Most HPLC mobile phases are benign. The problems come from the sample solvent, not the mobile phase. A few compatibility rules I keep on the wall:
- Acetonitrile, methanol, water, buffers (phosphate, acetate, formate): fine with borosilicate glass and silicone/PTFE septa.
- Dichloromethane, chloroform, hexane, toluene: fine with glass, but they attack silicone and swell it. Use PTFE-faced septa and crimp caps, and do not leave them on the autosampler overnight.
- DMSO: fine with glass, but it is hygroscopic and will pull water through a poor seal. Use crimp caps and check for volume drift on long sequences.
- Strong acids and bases (pH under 2 or over 12): glass is fine, but the septum and the cap liner are not. Use PTFE-lined caps and short hold times.
- TFA (0.1%): common in peptide work and generally fine, but it slowly attacks some silicone formulations. PTFE-faced septa are safer.
For a deeper compatibility matrix, the technical resources at Restek and the sample handling pages at Thermo Fisher chromatography and sample handling are both worth bookmarking. They publish septum and cap compatibility tables that save you a lot of guesswork.
Autosampler-specific fit: the part nobody checks
Every autosampler has a tray and a needle path with its own geometry. The 2 mL 12 x 32 mm format is near-universal, but the details are not. Before you buy 5,000 vials, confirm these against your instrument’s manual:
- Tray position count and pitch: a 100-position tray has a specific center-to-center spacing (often 14 mm or 15 mm). A vial with an oversized cap OD will collide with its neighbor.
- Cap OD limit: some trays accept a 9 mm screw cap but not an 11 mm crimp cap, and vice versa. Measure the cap, not the vial.
- Needle depth and bottom clearance: the needle should stop 1 to 2 mm above the vial bottom or insert tip. If your method sets a depth that touches the glass, you will chip the needle and shed glass into the sample.
- Gripper style: robotic grippers that lift the vial by the neck need a consistent neck OD. A cheap lot with a 0.5 mm neck variance will drop vials.
- Temperature control: if your tray is chilled (4 °C) or heated (up to 40 °C), confirm the septum and cap are rated for it. Most silicone/PTFE septa are fine from -40 °C to +120 °C in storage, but the working range on a tray is narrower. Check the datasheet.
Agilent publishes instrument-specific consumable compatibility tables at Agilent chromatography consumables and columns. If you run an Agilent system, start there. For everything else, the instrument manual is the authority, not the vial catalog.
The comparison checklist: what to buy for which workflow
Here is the decision table I actually use. Numbers are working values, not marketing claims.
- Routine reverse-phase HPLC, aqueous/organic mobile phase, 8-hour sequence: 2 mL clear borosilicate, 12 x 32 mm, 9 mm screw cap, silicone/PTFE septum, solid (not pre-slit). Budget 60 punctures per septum. Cost per vial: low.
- Same, but high-throughput (200+ injections/day): 2 mL clear, 9 mm screw cap, pre-slit silicone/PTFE septum. Tighter cap torque (0.6 N·m) and a torque driver. Accept slightly higher evaporation for speed.
- Volatile solvents (DCM, pentane, hexane): 2 mL clear, 11 mm crimp, PTFE-faced septum, crimped to a verified seal. Do not use screw caps for overnight volatile runs.
- Light-sensitive analytes: 2 mL amber borosilicate, same cap and septum as the routine case. Expect 15 to 25% higher vial cost.
- Basic or adsorbing analytes: 2 mL clear, silanized (deactivated) glass, PTFE/silicone/PTFE septum. Use only after you have confirmed adsorption is the problem.
- Sample volume under 200 µL: 2 mL vial with a 250 µL glass insert and polymer foot. Check seated height on the first 10.
- Trace analysis (ppb) or LC-MS: 2 mL clear, PTFE/silicone/PTFE septum, certified low-bleed lot, and a solvent blank run on every new lot before use.
- Headspace GC: dedicated headspace vial (20 mL, 23 x 75 mm) with butyl or PTFE-faced septum and crimp cap. Do not substitute a 2 mL HPLC vial.
If you are sourcing across multiple formats, the catalog at Sample Vial is organized by format and cap style, which makes the cross-reference faster. For method-specific consumable lists, the U.S. EPA SW-846 test methods specify vial and preservation requirements for environmental samples, and they are a good reality check on what a regulated method actually requires.
Operational precautions that prevent most failures
Buying the right vial is half the job. The other half is what happens on the bench.
- Never reuse a septum. A punctured septum does not reseal to its original specification. Reusing one is how you get a 3% RSD on an injection that should be 0.5%.
- Fill to a consistent level. Inconsistent fill volume changes headspace and evaporation rate. Pick a line (1.5 mL is standard) and stick to it.
- Cap immediately after filling. A vial that sits open for 10 minutes before capping has already lost volatiles and picked up dust.
- Check for coring visually. Hold the septum up to the light after a run. A visible plug missing or a ragged hole means the septum is done, regardless of puncture count.
- Run a solvent blank with every new lot. Inject mobile phase from a vial of the new lot before you trust it. If you see ghost peaks, the lot has extractables or the septa are bleeding.
- Store vials capped and upright. Dust inside a vial is a real source of baseline noise, and it is invisible until you see the chromatogram.
- Do not over-tighten screw caps. Hand-tight plus a quarter turn is the field rule; a 0.6 N·m torque driver is the lab rule. Pick one and enforce it.
The consumables team at Aijiren publishes lot-level specifications (glass type, septum material, puncture rating) that are useful when you are writing a purchase specification. If a supplier cannot give you those numbers in writing, put them in the PO as a requirement. It changes the conversation.
Troubleshooting checklist
When a run goes wrong, work through this in order. Most vial-related failures show up in the first three items.
- Vial not detected / tray error: check body height and neck OD against the tray spec. Measure 10 vials with a caliper. A lot that drifts beyond ±0.5 mm on height is the usual cause.
- Bent or blocked needle: check needle depth setting against the vial bottom or insert tip. A depth that touches glass will bend a 22-gauge needle within a few injections. Also check for septum coring.
- Ghost peaks or rising baseline: run a solvent blank from a new lot. If the blank is dirty, the septa or glass are the source. Switch to PTFE/silicone/PTFE and re-test.
- Poor injection precision (RSD over 2%): check fill level consistency, cap torque, and septum condition. A leaking cap shows up as a drifting peak area over the sequence, not as random noise.
- Sample loss on long sequences: check evaporation. Weigh a capped vial before and after a 12-hour tray run. More than 1% mass loss means the cap or septum is wrong for the solvent.
- Adsorption or tailing on basic analytes: try a silanized vial and a PTFE-faced septum on a test aliquot. If recovery improves, the glass was the problem.
- Cross-contamination between samples: check for a cored septum plug in the vial or a damaged needle seat. A single coring event can contaminate a whole tray.
When you need to cross-reference a replacement part number or compare formats across vendors, the catalog at Chromatography Products is a reasonable starting point for part numbers and specs.
What I would buy
For a general-purpose HPLC lab running reverse-phase methods on a modern autosampler, my standard order is: 2 mL clear Type I borosilicate vials, 12 x 32 mm, 6 mm neck, 9 mm screw thread, with PTFE/silicone septa in a solid (non-slit) cap, plus a box of pre-slit caps for high-throughput days and a box of amber vials for the light-sensitive methods. I keep a 0.6 N·m torque driver on the bench and a caliper in the drawer. For volatile work I keep a separate stock of 11 mm crimp vials and PTFE-faced septa. For small volumes I keep 250 µL inserts with polymer feet.
That kit covers roughly 90% of what a typical lab does, and it costs less per injection than the column. The remaining 10% (silanized glass, micro-vials, headspace vials) should be bought against a specific method, not stocked on a guess.
The takeaway: the autosampler vial is a precision component with a defined geometry, a finite septum life, and a chemical compatibility envelope. Specify the format (12 x 32 mm, 6 mm neck), the glass (Type I borosilicate, clear or amber), the cap (9 mm screw or 11 mm crimp), and the septum (silicone/PTFE, solid or pre-slit) in writing on every PO. Measure the first lot with a caliper, run a solvent blank, and replace septa before they core. Do those four things and the vial stops being the reason a run fails.
References & further reading
Related resources from our lab consumables network:
- Hplc Autosampler Vial at hplcautosamplervials.com
- Sample Vial at samplevialprice.com
- Chromatography Products at chromatographyselling.com
- Aijiren at aijirentech.com
External references and standards: