I have watched a lab lose three weeks of method validation because someone bought a case of 9 mm screw-thread vials with a 4 mm neck opening and then tried to run them on an autosampler set up for 6 mm necks. The needle bent on the first injection and the run aborted. Nobody noticed until the sequence had already burned through two plates of samples. That is the kind of mistake this guide exists to prevent. Vial selection is not glamorous work, but it is the single cheapest place to prevent a failed sequence, a bent needle, or a mystery peak that turns out to be a leaching plasticizer.
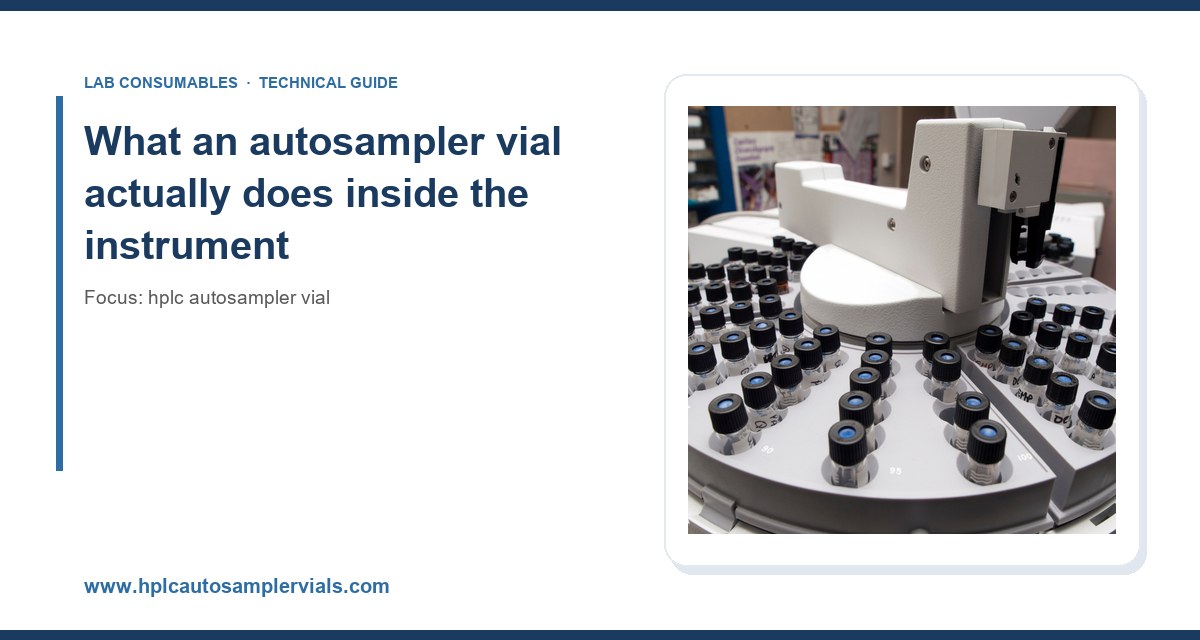
A vial is a container, a seal, and a geometry problem. The autosampler has to find the vial, grip or lift it, push a needle through the septum, withdraw a fixed volume, and move on, often 96 times in a row without human intervention. Every one of those steps depends on the vial matching the instrument’s mechanical expectations.
Three dimensions matter more than anything else on the datasheet:
- Overall height: typically 32 mm for standard 2 mL vials, 32 mm for most 9 mm screw-thread versions, and 38 mm for the taller 12 x 32 mm variants common on older Agilent 7673-style trays. A vial 2 mm too tall will jam a tray. A vial 2 mm too short will sit below the needle stroke and give you a partial or empty injection.
- Body diameter: 12 mm is the dominant standard for 2 mL vials. 11 mm and 15 mm formats exist for specific platforms. The tray pocket is machined to a tolerance of a few tenths of a millimeter, so a 12.2 mm vial will bind.
- Neck opening: 6 mm for standard 9 mm screw thread, 4 mm for the narrow-neck “wide mouth” crimp style sometimes called 11 mm, and 8 mm for the large-opening 10-425 screw thread. The needle guide on the autosampler tower is cut for one of these. Get it wrong and you bend needles.
If you are buying across multiple instrument brands, standardize on the 12 x 32 mm, 9 mm screw-thread, 6 mm neck format wherever possible. It is the closest thing the industry has to a universal fit. You can browse the full range of formats at Hplc Autosampler Vial to see how the dimensions line up across suppliers.
Closure systems: crimp, screw, and snap compared
The closure is where most of the real-world pain lives. There are three families and each has a place.
Crimp caps (11 mm aluminum)
Crimp caps give the best seal, full stop. A correctly crimped 11 mm aluminum cap with a 1 mm thick PTFE/silicone septum will hold volatile solvents for days and will not back off under autosampler vibration. The catch is the crimper. You need a proper crimping tool, and you need to set it correctly. I have seen labs run crimps at 0.8 Nm when the tool spec called for 1.2 to 1.5 Nm, which leaves the seal loose enough that acetonitrile evaporates out of a 24-hour run. Overtighten and you crush the septum, which causes coring and needle blockage.
Check your crimper monthly with a torque wrench or a factory gauge. Most manufacturers publish a target crimp height, typically 5.5 to 5.7 mm from the top of the cap to the vial shoulder. Measure it with calipers on five random vials per batch.
Screw-thread caps (9 mm)
Screw thread is the workhorse for modern labs. You can hand-tighten, and most autosamplers handle the cap without issue. The failure mode is under-tightening: a cap that is finger-tight but not snug will weep solvent over a long sequence, and you will see peak areas drift down by 2 to 4% RSD across a 96-well plate. Tighten with a torque-limited capper set to 0.6 to 0.8 Nm, or use a proper capping tool. Do not use pliers. I have seen pliers used. It did not end well.
Snap caps
Snap caps are fast and require no tooling, which makes them attractive for high-throughput screening. The trade-off is that the seal is mechanical, not compression-based, so volatile analytes can escape. Use snap caps only for aqueous or semi-volatile methods where you can tolerate a small loss. Do not use them for headspace or for anything with a boiling point below 100 °C.
For a broader comparison of closure costs and pack sizes, the pricing tables at Sample Vial are a useful starting point before you commit to a case quantity.
Septum material: the decision that drives your chromatography
The septum is where the vial meets the sample. It is also the most common source of extraneous peaks. Here is how the common materials behave:
- Silicone/PTFE (silicone-faced PTFE): the default for reversed-phase HPLC. The PTFE face contacts the sample and resists most solvents. The silicone gives the needle something to push through. Puncture count is typically 1 to 3 before coring risk rises. Temperature rating is around 60 °C continuous for the PTFE face.
- PTFE/silicone/PTFE (sandwich): both faces are PTFE, so the sample never touches silicone. Better for sensitive analytes. Slightly harder to pierce, so you need a sharp needle. Puncture count still 1 to 3.
- Natural rubber / butyl: high puncture tolerance (up to 10 for some formulations) but poor solvent resistance and a real risk of extractables. I would only use these for aqueous, non-UV methods.
- Pre-slit silicone/PTFE: the slit lets the needle pass without coring, which extends puncture count to 5 to 10. The trade-off is evaporation through the slit. Use only for short sequences (under 8 hours) or for aqueous samples.
If you run UV detection at 210 or 220 nm, septum extractables will show up. I have seen a phantom peak at 214 nm grow from 0.5 mAU to 8 mAU over a 12-hour sequence because the septa were a cheap natural rubber lot. Switching to a PTFE-faced septum eliminated it. Spend the extra 30% on the septum. It is cheaper than the investigation.
Temperature ratings and headspace
If you are running headspace GC, the vial and septum must survive the oven. Standard silicone/PTFE septa are rated to about 60 °C. For headspace at 80 to 150 °C, you need a high-temperature septum, usually a PTFE/silicone blend with a molded lip, rated to 200 °C for short excursions. Crimp caps are mandatory here. Screw caps will back off under thermal cycling.
Check the manufacturer’s continuous rating, not the peak rating. A septum rated for 200 °C peak is often only good for 120 °C continuous, and a headspace method that runs at 140 °C for 30 minutes will degrade it. The technical notes at Restek and the sample handling documentation from Thermo Fisher both publish septum temperature and extractable data that is worth reading before you specify a part number.
Glass grade and surface chemistry
Not all borosilicate is the same. Two grades matter:
- Type I borosilicate (USP <660>): the standard for HPLC. Low alkali leaching, good hydrolytic resistance. Use this unless you have a reason not to.
- Type II or III soda-lime: cheaper, but leaches sodium and calcium into aqueous samples. If you run ion chromatography or trace metals, this will show up as baseline drift.
For sensitive analytes (proteins, oligos, catecholamines), specify a deactivated glass vial. The interior is silanized to reduce surface adsorption. I have seen recovery of a 0.1 µg/mL peptide improve from 62% to 94% just by switching from standard to deactivated glass. That is not a small effect.
Amber glass is worth the small premium for photosensitive compounds (vitamins, some antibiotics, cannabinoids). The amber is in the glass, not a coating, so it does not leach.
Volume, fill level, and the injection
Standard 2 mL vials hold about 1.5 mL usable volume with a 9 mm cap. The autosampler needle typically reaches to within 1 to 2 mm of the bottom, but the actual draw point depends on the needle length and the instrument’s bottom-sensing routine.
Fill level matters more than most people think. A vial filled to 0.3 mL in a 2 mL vial has a large headspace, which means more evaporation and more chance of the needle hitting air on a partial-loop injection. A vial filled to 1.5 mL has minimal headspace and gives more consistent injection volumes. My rule: fill to at least 50% of nominal volume unless you have a specific reason not to.
For small-volume methods, use a 300 µL insert (6 x 29 mm) inside a standard 2 mL vial. The insert concentrates the sample at the bottom where the needle reaches. Use a polymer foot or a spring to keep it seated. A loose insert will tip and the needle will miss it. I have seen a 96-well plate ruined because the inserts were not seated properly and half the injections hit the side of the insert.
Chemical compatibility: the short version
Check your mobile phase and sample solvent against the vial and septum before you buy a case. The table below is the one I keep taped inside the cabinet:
- Acetonitrile, methanol, water: compatible with borosilicate, PTFE, silicone. Standard vials are fine.
- DMSO, DMF: compatible with glass and PTFE, but they will extract some silicone. Use PTFE/silicone/PTFE if you are running DMSO at high temperature.
- Dichloromethane, chloroform: will swell silicone and can extract plasticizers. Use PTFE-faced septa and short run times.
- THF: aggressive to many plastics. Use glass and PTFE only, and check the septum lot for extractables.
- Strong acids and bases (pH < 2 or > 12): will attack glass over time and can degrade the septum. Use Type I glass and PTFE, and do not store samples overnight in the vial.
Instrument-specific fit: what to check before you buy
Every major autosampler has a preferred vial format. Here is what I check first:
- Agilent 1260/1290 series: 12 x 32 mm, 9 mm screw thread, 6 mm neck. The standard tray holds 100 vials. The Agilent consumables catalog lists the exact part numbers and tray compatibility.
- Waters Alliance/e2695: 12 x 32 mm, 9 mm screw thread, but the carousel is tighter. Check the vial OD tolerance (12.0 ± 0.2 mm).
- Thermo Vanquish/Dionex: 12 x 32 mm, 9 mm screw thread. Some models accept 11 mm crimp with an adapter.
- Shimadzu Nexera/SIL-30: 12 x 32 mm, 9 mm screw thread. The rack is keyed, so a slightly oversized cap will not seat.
If you are running a mixed fleet, standardize on the 9 mm screw-thread format and buy a capping tool that fits it. The Aijiren line covers most of the common formats and publishes dimension drawings, which is useful when you need to confirm a tray fit before ordering 5,000 units.
Decision checklist: the numbers that matter
Use this as a one-page buying checklist. If a supplier cannot answer these questions, walk away.
- Dimensions: 12.0 ± 0.2 mm OD, 32.0 ± 0.5 mm height, 6.0 ± 0.2 mm neck ID.
- Glass: Type I borosilicate, USP <660> compliant, hydrolytic class 1.
- Septum: PTFE-faced silicone, 1.0 mm thick, temperature rated to at least 60 °C continuous.
- Puncture count: 1 to 3 for standard septa, 5 to 10 for pre-slit.
- Crimp torque: 1.2 to 1.5 Nm for 11 mm aluminum; crimp height 5.5 to 5.7 mm.
- Screw torque: 0.6 to 0.8 Nm for 9 mm caps.
- Extractables: certificate of analysis showing UV absorbance at 210 nm below 0.5 mAU for a blank injection.
- Lot traceability: lot number on the box, COA available on request.
- Pack size: 100 vials per pack is standard; 1,000 per case for high-throughput labs.
- Compatibility: confirm the tray and needle guide part numbers against the instrument manual.
Operational precautions on the bench
Even a perfect vial can fail if the operator does not handle it correctly. A few things I enforce in my own lab:
- Never touch the septum with bare fingers. Skin oils show up at 210 nm. Use gloves and handle by the cap skirt.
- Do not pre-pierce septa with a needle to “make it easier.” That defeats the seal and creates a coring path.
- Store vials capped and in the dark. Amber glass helps, but a clear vial on a windowsill will degrade photosensitive samples in a day.
- Check the needle after every 500 injections. A slightly bent needle will still inject, but the injection volume will drift. Replace at the first sign of a burr.
- Run a blank vial with mobile phase every 20 samples in a long sequence. It catches septum extractables and carryover before they ruin the run.
- Do not reuse vials for quantitative work. The septum coring and glass surface change after the first puncture. For qualitative screening, reuse is fine if you re-cap with a fresh septum.
Troubleshooting checklist: symptoms and likely causes
When a sequence goes wrong, work through this list before you blame the column:
- Peak area RSD > 2% across a plate: check cap torque (under-tightened caps weep), check fill level (too much headspace), check needle for a burr.
- Phantom peak at 210 to 220 nm: septum extractables. Switch to PTFE-faced septum and run a blank.
- Bent needle: neck opening mismatch (4 mm vs 6 mm), misaligned tray, or a tipped insert.
- Empty or partial injection: vial too short for the needle stroke, fill level below the needle draw point, or a loose insert.
- Baseline drift over a long run: solvent evaporation through a pre-slit septum or an under-crimped cap. Re-crimp and re-run.
- Carryover between injections: sample on the outside of the vial or cap, or a septum that has been pierced too many times and is coring.
- Vial jammed in the tray: OD out of tolerance. Measure with calipers. If it is over 12.2 mm, reject the lot.
What I recommend
For most reversed-phase HPLC work on a modern autosampler, specify a 12 x 32 mm, 9 mm screw-thread, 6 mm neck, Type I borosilicate vial with a PTFE-faced silicone septum, 1.0 mm thick, rated to 60 °C. Buy a torque-limited capper set to 0.6 to 0.8 Nm and use it every time. For headspace or high-temperature work, switch to 11 mm crimp with a high-temperature septum rated to 200 °C peak and a crimper set to 1.2 to 1.5 Nm.
For sensitive analytes, add deactivated glass and a PTFE/silicone/PTFE septum. For high-throughput screening where you can tolerate a small loss, pre-slit septa are acceptable if the sequence is under 8 hours.
If you are sourcing across multiple instrument brands, the Chromatography Products catalog and the U.S. EPA SW-846 method documentation both give you the compatibility data you need to cross-check a supplier’s claims. SW-846 in particular is worth reading for the sample preservation and holding-time requirements that drive vial choice in environmental work.
The bottom line: vial selection is a specification problem, not a shopping problem. Get the dimensions, the glass grade, the septum material, and the torque right, and the autosampler will do its job. Get them wrong, and no amount of method development will save the run.
References & further reading
Related resources from our lab consumables network:
- Hplc Autosampler Vial at hplcautosamplervials.com
- Sample Vial at samplevialprice.com
- Chromatography Products at chromatographyselling.com
- Aijiren at aijirentech.com
External references and standards: